You know that moment when a stuck key breaks your flow? It’s frustrating, especially when you rely on your laptop for work or study in India. You want a safer, effective way to remove dust and grime without risking damage.
This short guide sets clear expectations: routine dust removal, gentle disinfecting, and steps when a key stays unresponsive. You’ll learn a core method built on careful angles, controlled airflow, minimal moisture, and soft wiping.
If keys remain unresponsive after cleaning, Apple advises visiting an Apple Retail Store or an Apple Authorized Service Provider (guidance dated October 12, 2023). If you’re in Bangalore, consider professional help from iFix India, a premium independent Apple service option.
Key Takeaways
- Learn safer steps for routine keyboard care without harming your device.
- Focus on dust control, gentle wiping, and limited moisture.
- Try simple fixes first; stop DIY when keys stay stuck or unresponsive.
- Apple recommends professional service for persistent faults.
- If you’re in Bangalore, iFix India is a local premium option.
What you need to clean a MacBook keyboard safely
A short checklist of trusted items makes routine maintenance safer for your device and easier for you.
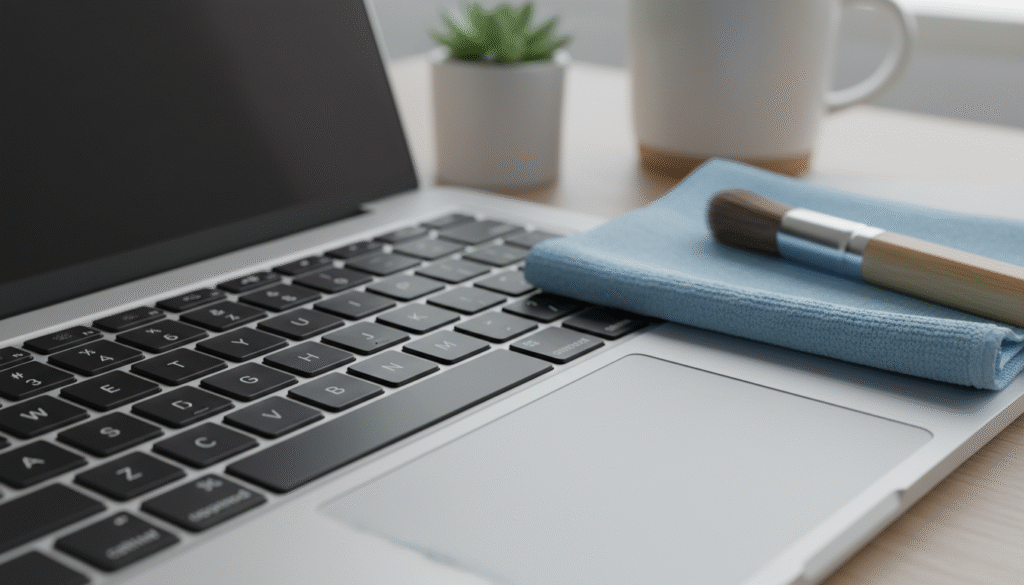
Microfiber cloths and lint-free wipes
Microfiber cloth grabs fine dust without scratching. Use a soft, lint-free cloth for final wipes so key surfaces stay streak-free. These items are common in India, online and at local electronics stores.
Compressed air and correct distance
Use the included straw to aim bursts. Keep the straw about ½ inch from the surface so debris moves out instead of deeper.
Important: do not invert the can while spraying; inverted cans can spit propellant or moisture.
Isopropyl alcohol and cotton swabs
For oily grime, use >90% isopropyl alcohol on a cotton swab that is damp — not dripping. Apply only where there’s visible buildup. If it’s just light dust, skip alcohol.

| Item | Why it helps | Availability in India |
|---|---|---|
| Microfiber cloth | Removes dust without scratching | Online marketplaces, local stores |
| Lint-free wipes | Prevents streaks on key surfaces | Pharmacies, electronics shops |
| Compressed air can (with straw) | Targets debris; straw keeps spray focused | Electronics retailers, e-commerce |
| Isopropyl alcohol & cotton swabs | Removes oily residues safely when used damp | Hardware stores, online |
Prep steps before you start cleaning
Take a calm minute before you begin. Start by powering down your laptop and unplugging the charger and any accessories. This reduces accidental presses and the risk of moisture causing a short.
Set up a small cleaning station: work near a bin or sink, on a clean, flat surface with good light. Gather your cloths and air can so you won’t rush.

Shut down and unplug
Fully shut the machine off rather than leaving it asleep. Disconnect cables, headphones, and any USB drives. That saves you time later and prevents accidental input.
Shake out loose debris
Hold the closed laptop at a slight angle over a trash can. Gently tip and give light taps—do not jab or rub. This moves crumbs and loose dust away without pushing particles deeper under the keys.
“Power off first. A few quiet minutes up front makes the rest safer and quicker.”
- Can you do this while it’s on? No — always power down first.
- Take the time to let any damp wipes dry fully before restarting.
How to clean macbook keyboard with compressed air and a microfiber cloth
Begin with a slight tilt—about 75 degrees—so loose dust falls out instead of lodging under key edges.
Hold your laptop at an angle
Set the laptop nearly upright so gravity helps dislodge particles. This reduces the risk of pushing dust deeper under the keys.
Air blow technique
Use compressed air in short bursts, sweeping left to right across the rows. Keep the straw roughly ½ inch from the surface and avoid inverting the can.
Rotate and repeat
Turn the laptop 90 degrees and repeat the air blow pattern. Cover multiple angles so trapped debris can escape from tight edges.
Wipe and spot-clean
Follow air with a damp, lint-free cloth—damp, not dripping. For stubborn marks, use an alcohol-dampened cotton swab and press gently rather than scraping.
Dry and check
Dry with a soft lint-free cloth and wait 5–10 minutes before powering on. Check that keys feel normal, there’s no visible moisture, and no residue remains.
| Step | Action | Why it matters |
|---|---|---|
| Position | Hold at ~75° | Helps dust fall away from keys |
| Air blast | Sweep left→right, straw ~½ inch, do not invert | Targets debris without adding moisture |
| Rotate | Repeat at 90° increments | Reaches trapped particles at edges |
| Finish | Wipe, spot-clean with alcohol, dry, wait | Protects finish and prevents short circuits |
Disinfecting your keyboard without damaging the finish
When several people share a laptop, a gentle disinfecting routine keeps germs down without harming the finish.
Choose non-bleach wipes and remove excess moisture
Pick wipes that do not contain bleach. Bleach can dull or strip Apple finishes and other premium surfaces used in electronics.
Squeeze each wipe before use so it is damp, not dripping. Excess liquid can run into crevices around the keys and cause problems later.
Gentle pressure, slow passes, immediate drying
Use slow, light strokes across keys and along edges. Avoid vigorous scrubbing that wears coatings over time.
After you pass the wipe, dry the area right away with a clean, soft lint-free cloth. That step helps remove trapped moisture.
- When to disinfect: shared workstations, travel, classrooms, or any device multiple people touch.
- Technique: squeeze wipe, use gentle pressure, clean edges and between keys carefully.
- Timing rule: wait about 5–10 minutes before powering on so any remaining dampness evaporates.
| Concern | Recommended action | Why it matters |
|---|---|---|
| Shared use | Disinfect with non-bleach wipes | Reduces germs while protecting finish |
| Excess liquid | Squeeze wipes, keep surface damp-only | Prevents moisture into electronics |
| Finish wear | Use soft cloth and light pressure | Preserves coating and appearance |
| Powering on | Wait 5–10 minutes after drying | Ensures no dampness remains near electronics |
“Less liquid is always better—your device is electronics first; disinfecting is a careful, minimal step.”
Sticky keys, debris under keys, and what to avoid on newer MacBooks
Sticky or inconsistent keys often point to trapped debris, spill residue, or a worn switch beneath the cap. You can often free particles with patient, angled bursts rather than force.
When not to pry fragile keycaps
Do not pry keycaps on butterfly-style mechanisms. Any 2015+ MacBook or 2016+ MacBook Pro uses thin clips that break easily. Prying can damage the scissor or butterfly parts and void repairs.
Safer ways to dislodge debris
Use compressed air in short bursts while holding the laptop at several angles. Aim small pulses at the edge and rotate the device so dust moves out instead of inward.
Common mistakes to avoid
- Avoid excess liquid or soaking — liquids can ruin switches and electronics.
- Skip rough towels that scratch finishes or push particles deeper.
- Don’t press hard while wiping; that can lodge debris under the cap.
“If a key still misbehaves after careful cleaning, professional service is safer than aggressive DIY.”
If cleaning fails, seek repair. In Bangalore, iFix India offers Apple-focused service with walk-in, doorstep for minor fixes, and pickup & drop for complex jobs like keyboard replacement and deeper diagnostics.
Keeping your MacBook Pro keyboard cleaner in daily use
A short weekly habit makes a big difference in keeping your laptop tidy and hygienic.
Simple daily choices cut dust and germs. Don’t eat near the device and wash your hands before long typing sessions. Those two steps drop crumbs and oils that cause sticky keys over time.
Use a microfiber cloth for quick wipes several times each week. A gentle pass across the keys removes surface dust without wearing finishes. If people share the device, do a light disinfect once weekly.
For dusty workspaces, schedule brief compressed air bursts every few weeks. Store the laptop closed in a clean sleeve when not in use, and avoid leaving it open near windows or fans that stir debris.
Spot it early checklist
- Keys lose their shine
- Typing feels sticky or uneven
- Visible crumbs between rows
Quick reminder: if wear, unresponsive keys, or deeper hardware issues appear, iFix India in Bangalore acts as a one-stop solution for Apple repairs beyond simple upkeep.
“Small, regular habits save you time and reduce the need for major fixes later.”
Conclusion
Confirm each key moves freely and that the surface is dry before reconnecting power or peripherals.
Quick recap: power the laptop down, tip and shake gently, use short compressed-air bursts at the correct distance and angles, wipe with a barely damp cloth, and dry fully. Less liquid is better for electronics.
Use isopropyl or a dab of isopropyl alcohol only for small grime spots. Success looks like even key travel, no sticky patches, and a fully dry device before you turn it on.
If problems persist, seek professional diagnostics. Bangalore users can visit iFix India (ifixindia.in) for macbook pro and Mac repairs, SSD/RAM upgrades, battery work, or pickup, doorstep and walk-in service. They also support select Windows laptops and phones.


About The Author: Imran
More posts by imran