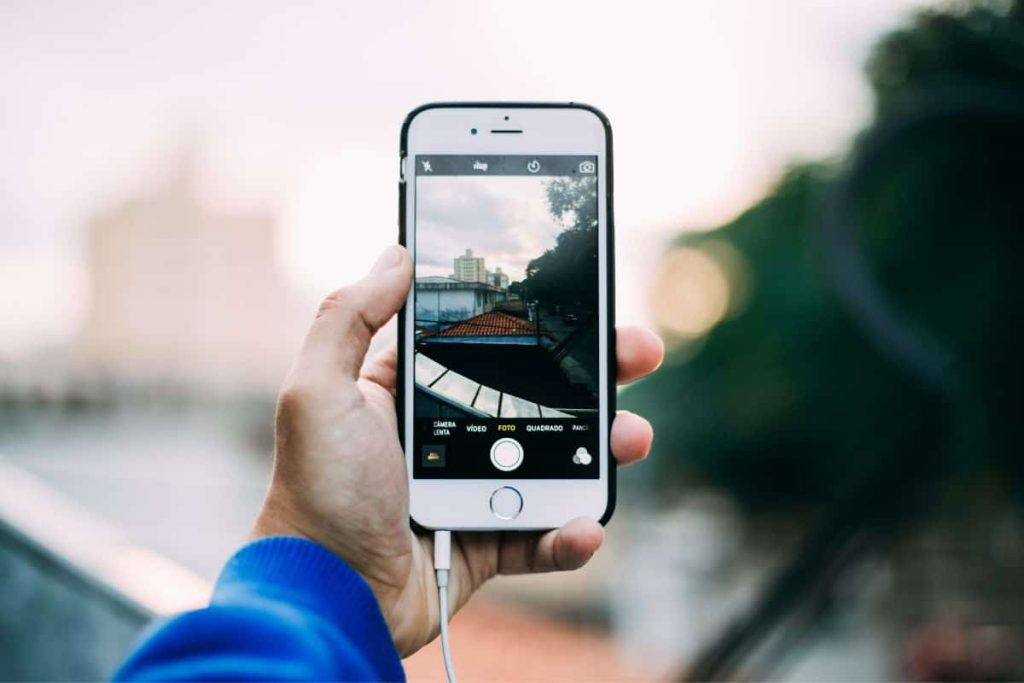
With the massive advancement of iOS technology and people’s growing interest in them, iPhone has become one of the most sought-after smartphones globally. The camera and photographic capacity have been a matter of pride for Apple for the longest time. In this blog, you will find 28 amazing iPhone photography tips for better photos in 2023. These tips are well-acknowledged among users and you can really upskill your clicks with them. Let’s dive into exploration!
Here are 28 must know iPhone photography tips you should know:
- Know Your Lenses
- Clean Your Lenses, Or Don’t
- Rule of Thirds
- Use the Grid
- Leading Lines
- Macro Lens
- Use HDR
- Be Careful with the Natural Light
- Experiment with Filters
- Experiment with Angles
- Experiment with Lighting
- Experiment with Exposure
- Experiment with Portrait Mode
- Experiment with Natural Lighting
- Wide-Angle Lens
- Telephoto Lens
- Symmetry
- Use Portrait Orientation
- Use Landscape Orientation
- Play with Silhouettes
- Embrace the Pattern
- Shadows
- Reflections
- Be Playful with Other Alignments
- Lock the Focus
- Minimalism
- Negative Space
- Practice, Practice, and Practice.
- How iFix maximizes your iPhone camera’s efficiency?
- Frequently Asked Questions (FAQs)
- The bottom lines 28 iPhone Photography Tips for Better Photos in 2023
Tip #1 Know Your Lenses
Each iPhone model has a unique set of lenses with their own features. When you understand all of their features and know how to use them, your whole game levels up. So, take full advantage of all the iPhone lenses you have access to.
Tip #2 Clean Your Lenses, Or Don’t
Keep your iPhone lenses clean for better picture effects. Nowadays photographers try to create different effects by using water or any element onthe lenses. However, it is better not to tamper with the glass quality of the lens to get the maximum clarity in your picture.
Tip #3 Rule of Thirds
It’s a technique where you divide the frame into thirds, both horizontally and vertically. And then place the main object at one of the intersections.
Tip #4 Use the Grid
Basically the Rule of Thirds, but here you don’t need to imagine the frame divided into thirds, horizontally and vertically. The grid makes life easier.
Tip #5 Leading Lines
It’s another composition technique where you use the lines in the picture to guide the viewer’s attention toward the subject.
Tip #6 Macro Lens
You can not miss the impeccable Macro Lens in an iPhone photography tips blog. Macro Lens is probably the reason why you have an iPhone in the first place, it’s great for capturing close-up shots with great details.
Tip #7 Use HDR
As you have HDR mode to enhance the picture quality, then why won’t you use it? It elevates your click to the next level in seconds.
Tip #8 Be Careful with the Natural Light
The effect of HDR can sometimes make your photo look over processed. So, instead of not using that try to recognize when natural light is sufficient to bring that brightness and clarity in your picture. This has to be one of the most underrated iPhone photography tips but you have to use HDR smartly in natural light.
Tip #9 Experiment with Filters
Experiment with filters after clicking the pictures, experiment during clicking them, have fun with them, and see what clicks (pun intended).
Tip #10 Experiment with Angles
You can experiment with different angles to find out the best way to take a picture. Squat, lay on the floor, roll over a little, hype them up, and commit to it! And have fun
Tip #11 Experiment with Lighting
Lighting can be a deal-maker or breaker. Make sure that it’s either making your composition look beautiful or adding some meaning to it.
Tip #12 Experiment with Exposure
One of the best iPhone photography tips for beginners is adjusting the exposure before clicking. It makes a massive difference!
Tip #13 Experiment with Portrait Mode
You can create a depth effect using iPhone’s Portrait Mode. This effect cuts the monotone of all 2D pictures and creates an illusion of depth. Also blurs out unnecessary background stuff.
Tip #14 Experiment with Natural Lighting
The light looks different from different angles. Another extremely underrated iPhone Photography tip for beginners is that natural light interacts with different skin shades, fabrics, colors, etc differently.
Tip #15 Wide-Angle Lens
Coming back to lenses, iPhone’s wide-angle lens is the most apt for stunning landscapes and memorable group shots.
Tip #16 Telephoto Lens
A telephoto lens is a very beneficial option in iPhone camera settings. While you can use it for the same, you can also use it to capture faraway subjects.
Tip #17 Symmetry
Awaken the Wes Anderson in you, and start searching for symmetrical shots that fully capture one’s presence in their truest figure. Also, make that reel, post, and tag us, please, I love them.
Tip #18 Use Portrait Orientation
Also known as Vertical Orientation, is used to draw attention to the subject, most of the time by bringing the object closer and adding depth to its background.
Tip #19 Use Landscape Orientation
Similar to Portrait Orientation, Landscape Orientation’s goal is to capture a wider composition. These kinds of pictures don’t make any individual object the center of attention, rather the composition as a whole is on display.
Tip #20 Play with Silhouettes
Nothing looks better than a good ol’ shadow portrait during sunset. Or any time for that matter. Silhouettes are timeless, classy and sleek, they are never out of trend.
Tip #21 Embrace the Pattern
Be it a trippy graffiti wall, a lineup of different fabrics, or a gothic mansion. Patterns add so much fun to a picture. This is one of my top iPhone Photography tips. Use the pattern strategically in your composition and place the object to cut the monotony of the pattern. It always works.
Tip #23 Reflection23
Mirror selfies are great, but have you seen mirror photos? There’s just so much you can do with a subject, adjustable lighting and a mirror. It can bring symmetry, a sense of balance and self-reflection to the composition.
Tip #24 Be Playful with Other Alignments
iPhone Photography tips are useless for you if you don’t capture something interesting, fun, and modern. And nothing screams more modernistic than an intentional misalignment in a composition.
Tip #25 Lock the Focus
This is more for videographers but hey, who doesn’t wanna be the Jack of all trades, huh? There’s an option in your iPhone to lock focus and exposure, use it, and use it well.
Tip #26 Minimalism
We talked a lot about compositions today. Let’s lighten up the mood because minimalistic photos are great and widely loved as well. One of the most beloved iPhone Photography tips is to capture a clear image of the subject in a plain or relatively idle background.
Tip #27 Negative Space
Negative Space is the plain, simplistic, or relatively idle background that we discussed earlier. You can use negative space strategically to create a feeling of loneliness, and simplicity. It can also be used to draw more attention to the subject(s).
Tip #28 Practice, Practice, and Practice.
Read this mantra out loud- I will start implementing all of the above- mentioned iPhone Photography tips for beginners and click better pictures for my loved ones and myself. Good job!!
Frequently Asked Questions (FAQs)
How to make iPhone pictures look better?
Go to Camera Settings, then to Formats and change it to High Efficiency. It
would from then on save all photos in the HEIF Format.
How to take good photos with iPhone 13?
Use the ProRaw feature of format, especially if you do post-production editing in PhotoShop or Lightroom.
What are the top iPhone 14 photography tips?
The top iPhone Photography hacks include taking advantage of sensor-shift image stabilization. The lens unit doesn’t move, the sensor does, therefore it acts as a Steadicam, so try out wild angles. Go berserk!
What are some basic iPhone photography tips?
Some basic iPhone Photography hacks include turning on the grid and applying the infamous rule of thirds and leading lines.
Where you can get ideas on iPhone photography tips?
You can follow the comment thread of iPhone photography tips Reddit to get different people’s opinions on iPhone photography.
How iFix maximizes your iPhone camera’s efficiency?
If there is any issue pertaining to your iPhone’s camera, the tech-savvy professionals at iFix can give you a ray of hope. They are well aware of the intricacies of iPhone functions and know the exact fix for any issue. So, why wait? Get in touch with our dedicated minds to enhance the efficiency of your iPhone camera. You can visit our website at www.ifixindia.in or call us at 7676400900.
Over time, we have cemented our place as one of the top-rated iPhone service centers in Bangalore. Currently, we have branches in Marathahalli, Koramangala, BEL Road, Kammanahalli, Indiranagar 100 Feet Road and Building No. 9 1 st Cross, 17 th Main Rd.
The bottom lines for 28 iPhone Photography Tips for Better Photos in 2023
So, this was the knowledge part that you should know. Now it’s time to explore on your own. An iPhone is a fantastic gadget to click photos and capture what your eyes and mind can see together. Given its high-quality lenses, amazing features, and adjustments, you can actually even become a photographer or a
videographer. Well, do you think the piece has missed out on any iPhone photography tips for beginners? If yes, then quickly comment below!




About The Author: Imran
More posts by imran